
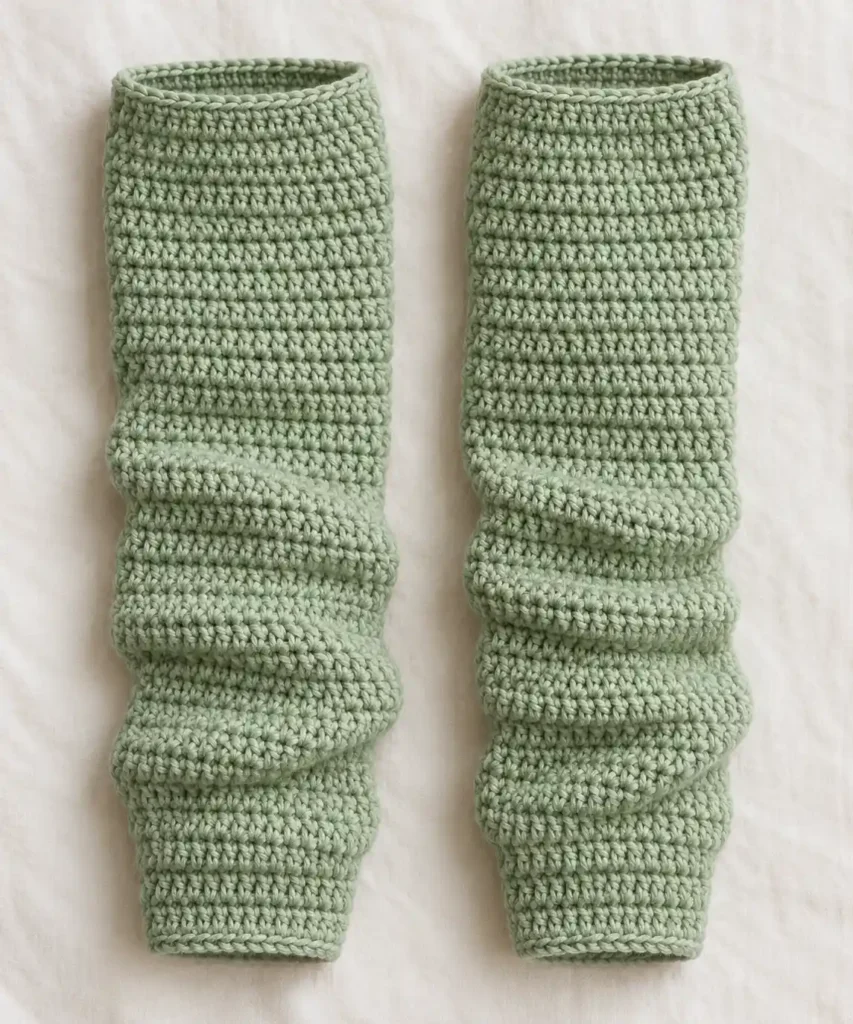
These cute green crochet leg warmers combine a dense, softly slouching crochet tube with a decorative eyelet band, scalloped trim, matching drawstring bow, and two small flower charms on each leg warmer.
The body is worked mostly in simple half-double crochet, while the decorative details are kept in separate construction stages. This is important at the top and bottom edges: the visible eyelet openings remain open instead of being filled by the scallop stitches, giving the finished leg warmers the same layered lace-and-scallop appearance.
Project at a glance
| Skill level | Advanced beginner |
|---|---|
| Terminology | US crochet terms |
| Construction | Joined turned rounds with separate eyelet bands, scalloped edging, drawstrings, and flower charms |
| Main stitch | Half-double crochet |
| Yarn | DK to light-worsted smooth cotton blend or acrylic blend |
| Hook | 4 mm crochet hook |
| Approximate finished length | About 14–15 in / 36–38 cm at the listed gauge |
| Approximate circumference | About 11 in / 28 cm at the ankle and 12 in / 30.5 cm through the upper section |
The extra body length is intentional. Rather than fitting smoothly from ankle to calf, the fabric is pushed downward into several broad, irregular folds to create the soft scrunched appearance.
Materials
- Smooth DK or light-worsted yarn in one muted sage-green color, approximately 350–450 yd / 320–410 m for the pair
- 4 mm crochet hook, or hook size needed to obtain the intended fabric density
- Tapestry needle
- Scissors
- Locking stitch marker
A smooth yarn with visible twist is especially useful for this design. It keeps the compact body stitches distinct and allows the little flowers, eyelets, cords, and scallops to remain clearly defined.
A cotton-acrylic or similar blend works well because it provides enough structure for the leg warmers to hold their folds without making the finished fabric stiff. Very fuzzy yarn can obscure the decorative openings and small flower petals.
Gauge
Aim for approximately 16 hdc and 12 rounds = 4 in / 10 cm in the main body fabric.
The fabric should feel dense and substantial but should still stretch comfortably sideways. If your tube feels rigid, move up a hook size. If the stitches become loose enough that the leg warmer cannot hold its gathered folds, move down slightly.
Stitches and abbreviations
- ch – chain
- dc – double crochet
- hdc – half-double crochet
- sc – single crochet
- sl st – slip stitch
- sp – space
- st/sts – stitch/stitches
- RS – right side
- WS – wrong side
Hdc increase: Work 2 hdc into the same stitch.
Scallop: Work 5 dc into the indicated stitch. The skipped stitches on either side allow the group to spread into a rounded shell.
Before you start
The main tube is crocheted in joined rounds and turned after each body round. Turning helps keep the dense half-double crochet fabric balanced and reduces the strong diagonal bias that can appear when all joined rounds are worked in the same direction.
The beginning ch 1 does not count as a stitch. The joining slip stitch does not count as a stitch either. Join each body round directly to the first actual stitch.
The foundation edge becomes the ankle edge. After completing the body and upper trim, you will return to the unused underside loops of the foundation chain to crochet the separate lower eyelet and scallop edging.
The decorative eyelet round and the scallop round are deliberately separate. Do not work the scallops directly into the drawstring eyelets, because those openings need to remain clear and visible.
🧶 Crochet Tip: Mark the first hdc of every body round. In this dense texture, the joining slip stitch can easily be mistaken for a real stitch and accidentally increase the stitch count.
Crochet pattern
Leg warmer body — make 2
Ch 44. Without twisting the chain, join with a sl st to the first ch to form a ring.
R1: Ch 1, hdc in the same ch as the join and in each remaining ch around. Join with sl st to the first hdc. Turn. (44 sts)
R2–R16: Ch 1, hdc in each st around. Join with sl st to the first hdc. Turn. (44 sts each round)
This section forms the narrower ankle and lower-leg portion.
R17: Ch 1, [hdc in next 10 sts, 2 hdc in next st] × 4. Join with sl st to the first hdc. Turn. (48 sts)
The four evenly spaced increases create a gentle transition into the slightly wider upper portion without producing a visible flare.
R18–R38: Ch 1, hdc in each st around. Join with sl st to the first hdc. Turn. (48 sts each round)
🧶 Checkpoint: The unfinished tube should be gently wider through the upper section but should not look sharply flared. When pushed together lengthwise, the fabric should collapse naturally into several broad folds.
Upper drawstring eyelet band
After R38, turn so the RS is facing you. From this point through the upper edging, do not turn.
R39: Ch 1, [sc in next 3 sts, ch 1, skip next st] × 12. Join with sl st to the first sc. Do not turn. (36 sc, 12 ch-1 eyelets)
This is the actual drawstring row. Keep the twelve ch-1 spaces open.
Upper scallop support round
R40: Ch 1, sc in each sc and 1 sc in each ch-1 sp around. Join with sl st to the first sc. Do not turn. (48 sc)
This solid support round separates the bow eyelets from the scalloped edge. The openings from R39 should still remain visibly below it.
Upper scalloped edge
R41: Ch 1, [sc in next st, skip next st, 5 dc in next st, skip next st] × 12. Join with sl st to the first sc. Fasten off. (12 scallops)
Gently spread each five-double-crochet shell with your fingers. The scallops should sit around the top like a soft crown rather than lying completely flat.
Lower decorative edging
Turn the leg warmer so the original foundation edge is uppermost. With the RS facing you, join the yarn to one unused underside loop of the foundation chain.
Lower Edging R1: Ch 1, sc once in each unused foundation loop around. Join with sl st to the first sc. Do not turn. (44 sc)
This first round creates a stable base for the lower trim.
Lower Edging R2: Ch 1, [sc in next 3 sts, ch 1, skip next st] × 11. Join with sl st to the first sc. Do not turn. (33 sc, 11 ch-1 eyelets)
These openings form the visible row of small holes immediately above the lower scallops.
Lower Edging R3: Ch 1, sc in each sc and 1 sc in each ch-1 sp around. Join with sl st to the first sc. Do not turn. (44 sc)
This round preserves the decorative openings from the previous round while providing a solid foundation for the scalloped edge.
Lower Edging R4: Ch 1, [sc in next st, skip next st, 5 dc in next st, skip next st] × 11. Join with sl st to the first sc. Fasten off. (11 scallops)
The smaller ankle circumference naturally gives the lower edge one fewer scallop than the top.
Drawstrings — make 2
Each leg warmer uses one long matching drawstring.
Row 1: Ch 105.
Row 2: Beginning in the second ch from the hook, sl st loosely in each ch across. Fasten off, leaving a sewing tail at both ends. (104 sl sts)
The row of slip stitches produces a narrow rounded cord with more substance than a bare foundation chain. Keep your tension relaxed so the cord remains flexible enough to tie neatly.
Five-petal flower charms — make 4
Ch 4 and join with sl st to the first ch to form a small center ring. Do not tighten this ring closed; the little central opening is part of the flower’s appearance.
Flower R1: [Ch 2, hdc in the ring, 2 dc in the ring, hdc in the ring, ch 2, sl st in the ring] × 5. Fasten off. (5 petals)
Use your fingers to round each petal outward while keeping the center opening visible. The completed flower should be compact and approximately circular with five clearly separated lobes.
Attach the flower charms
Each drawstring receives one flower on each end.
Place one drawstring end against the WS of a flower so the cord finishes directly behind the center ring. Thread the drawstring tail onto a tapestry needle.
Sew through the end of the cord and through the bases of two adjacent flower petals three or four times. Keep these securing stitches on the back of the flower so the five-petal outline remains clean from the front.
Weave the remaining tail through the backs of several flower stitches and trim. Repeat with the second end of the cord, then prepare the second drawstring in the same way.
The flowers should connect directly to the cord ends without an extra length of loose yarn between the cord and flower.
Thread the upper drawstring
Position the joining seam at the center back of the leg warmer. The opposite side is the center front.
Locate two neighboring R39 eyelets at the center front. Insert one flower-tipped end of the drawstring through the first opening from the outside toward the inside.
Continue weaving the cord over and under the fabric through each successive R39 ch-1 eyelet around the entire circumference. Bring the cord back to the outside through the neighboring front eyelet.
Center the drawstring so both flower-tipped ends hang to approximately the same length. Tie the ends into a relaxed bow at the front.
🧶 Watch for: The drawstring is mainly decorative. Tighten it only enough to give the top a gentle gathered shape. Pulling firmly will collapse the eyelet openings and distort the upper scallops.
Finishing and shaping
Weave all remaining yarn ends into the WS of the work, following nearby stitch paths so the ends do not create visible lumps in the smooth sage fabric.
If the decorative edges need help opening, lightly damp-block the finished leg warmers. Lay each piece flat without stretching the body longer. Arrange the upper and lower scallops individually with your fingertips and leave them until completely dry.
The body itself does not need to be blocked perfectly flat. The pronounced slouch is part of the finished design.
To create the characteristic shape, hold the leg warmer upright and push the lower half of the fabric upward. Allow the excess length to form several broad accordion-like folds. Adjust the folds so they vary slightly in depth instead of looking like identical pleats.
The upper portion should remain relatively smooth so the bow and dangling flower charms are easy to see, while most of the scrunching sits through the middle and lower half.
When worn, place the scalloped upper edge below the knee and distribute the excess fabric downward toward the ankle. Keep the bow centered at the front.
Adjusting the fit
The standard pattern begins with 44 stitches at the ankle and increases to 48 stitches through the upper section. Check the circumference before completing both leg warmers, especially if you are substituting a yarn with noticeably different stretch.
Narrower version
Begin with ch 40. Work R1–R16 with 40 sts.
For R17, work [hdc in next 9 sts, 2 hdc in next st] × 4. (44 sts)
Continue the upper body with 44 sts.
For the upper drawstring eyelet round, work [sc in next 3 sts, ch 1, skip next st] × 11. Work 44 sc in the following support round, then work [sc in next st, skip next st, 5 dc in next st, skip next st] × 11 for the upper scallops.
At the lower edge, work 40 sc in Lower Edging R1. Work [sc in next 3 sts, ch 1, skip next st] × 10 for Lower Edging R2, work 40 sc in Lower Edging R3, then work [sc in next st, skip next st, 5 dc in next st, skip next st] × 10 for the scalloped edge.
Roomier version
Begin with ch 48. Work R1–R16 with 48 sts.
For R17, work [hdc in next 11 sts, 2 hdc in next st] × 4. (52 sts)
Continue the upper body with 52 sts.
For the upper drawstring eyelet round, work [sc in next 3 sts, ch 1, skip next st] × 13. Work 52 sc in the following support round, then work [sc in next st, skip next st, 5 dc in next st, skip next st] × 13 for the upper scallops.
At the lower edge, work 48 sc in Lower Edging R1. Work [sc in next 3 sts, ch 1, skip next st] × 12 for Lower Edging R2, work 48 sc in Lower Edging R3, then work [sc in next st, skip next st, 5 dc in next st, skip next st] × 12 for the scalloped edge.
Changing the length
For more dramatic slouching, add 3–6 ordinary hdc rounds between R18 and the upper decorative section. For a shorter fit, remove 3–5 rounds from the same area.
Make exactly the same length adjustment to both pieces. Keep the decorative rounds unchanged.
Troubleshooting
- The leg warmer develops a noticeable spiral: Make sure you turn after every body round through R38. Working all the dense hdc rounds in one direction can create more diagonal bias.
- The bow eyelets disappear under the upper scallops: The scallops have been attached too soon. Keep R39 as the open eyelet row, work the separate solid R40 above it, and place the scallops only on R41.
- The lower trim does not show a separate row of holes: Do not crochet the scallops into the Lower Edging R2 chain spaces. Work the solid support round first, then crochet the shells from that new round.
- The top pulls tightly around the leg: The eyelet-round single crochets or chains may be too tight. Relax your tension through the decorative band and avoid tightening the joining slip stitches.
- The scallops curl instead of opening outward: Work the double crochets with relaxed tension and lightly damp-block the finished edge.
- The flower charms twist sideways: Secure each cord across the bases of two neighboring petals rather than sewing it to a single narrow point.
Final details
- Both leg warmers should contain the same number of body rounds and identical increase placement.
- The standard upper trim should have 12 clearly visible drawstring eyelets and 12 scallops as two separate decorative levels.
- The standard lower trim should have 11 visible eyelets above 11 scallops.
- Each leg warmer should have one bow drawstring with two separate five-petal flower charms.
- Most of the slouching should sit through the middle and lower body while the decorated upper section remains easier to see.
The finished pair should have a dense sage-green crochet body, pronounced soft folds, a clearly separated eyelet-and-scallop trim at both ends, and a centered flower-tipped bow on each leg warmer.
If you make a pair, feel free to share how yours turned out or leave a question if you need help with the fit, eyelets, flowers, or scalloped edging.












